Start the Application
Compile and run the new backend application
Database & Keycloack
Since in this tutorial we will download and start an application that will use our SOKit backend framework, in order to have an up and running application you should start the database and Keycloack using Docker (ensure you have Docker installed on your machine).
In particular, you will have to check that the Postgres and Keycloack containers are correctly started as in the figure below:

Making gradlew Executable
If could encounter a permission error when running ./gradlew, it may be because the file is not executable. To fix this, run the following command from the root of your project:
chmod +x ./gradlew
This grants execute permission, allowing you to run Gradle commands using the wrapper.
Compile & Run
To compile, enter in the root of the project using cd command line from the terminal, and then run:
./gradlew clean build
To start (and develop), run:
./gradlew quarkusDev
With the parameters shown in the previous SOKit initializer section, the application will run on port 8080, and the API, along with OpenAPI (Swagger), will be accessible at that port.
If successful, the terminal will display output indicating the application has started. You should see logs showing tasks being executed and the server starting, such as:
so-demo-app 1.0.0 on JVM (powered by Quarkus 3.17.8) started in ...
Listening on: http://0.0.0.0:8080
Profile dev activated. Live Coding activated.
Using IntelliJIdea Community Version
When developing Quarkus applications, setting up IntelliJ can significantly speed up your development. This guide walks you through installing the necessary plugin and configuring IntelliJ to run Quarkus all without needing to open the terminal.
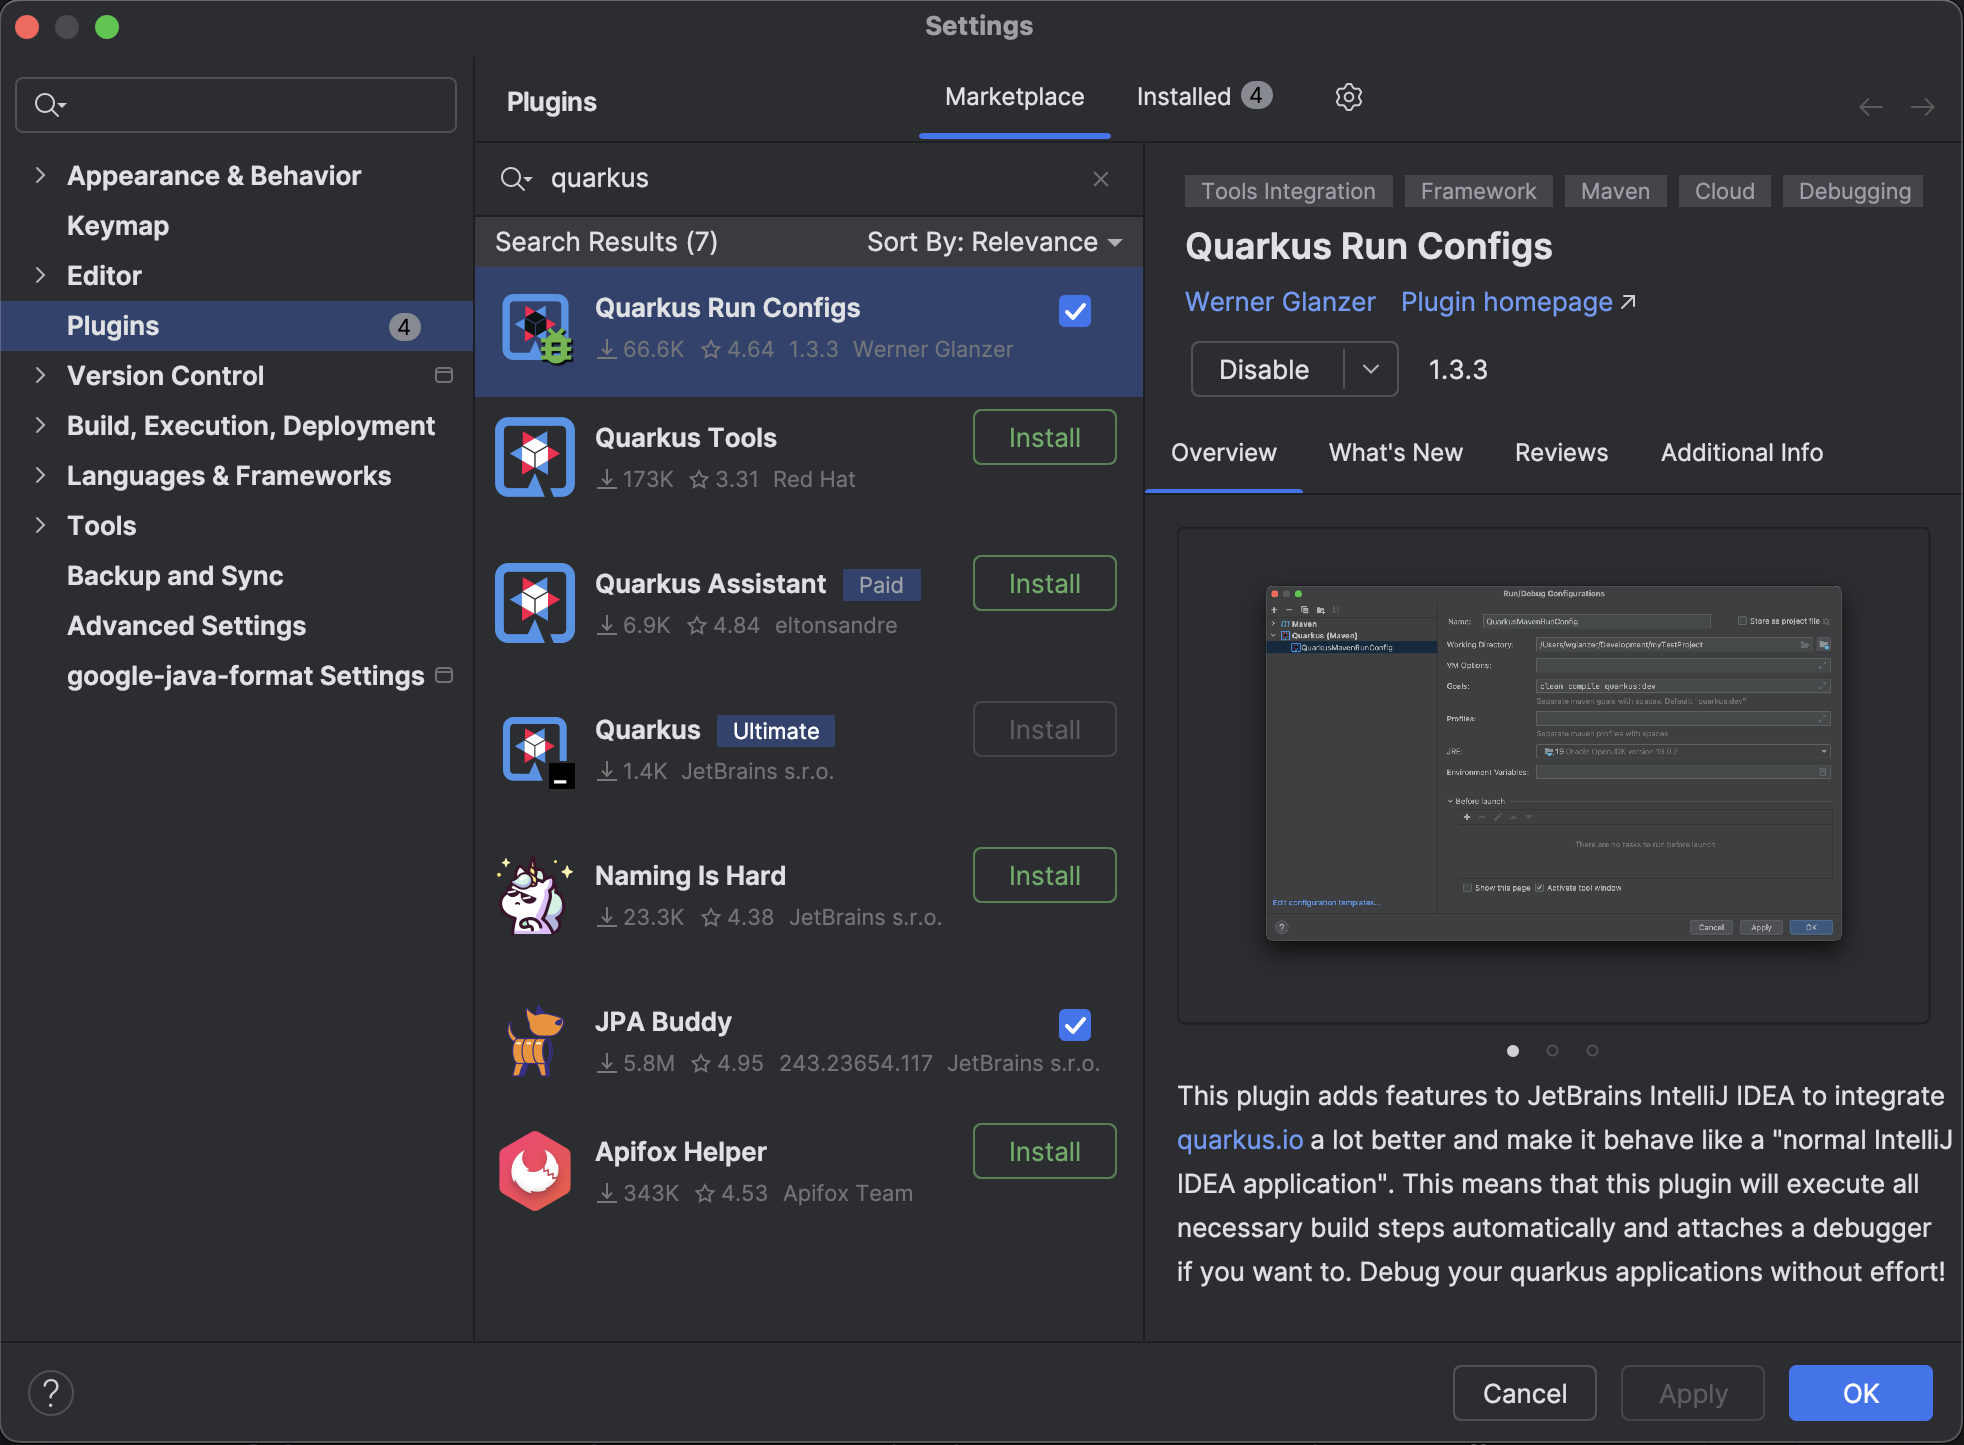
- Install the Quarkus Run Configs Plugin
To make your life easier when running Quarkus from IntelliJ:
- Open Settings (press
Command+,on Mac) - Go to Plugins
- Click the Marketplace tab
- Search for Quarkus Run Configs
- Click Install
- Restart IntelliJ if prompted
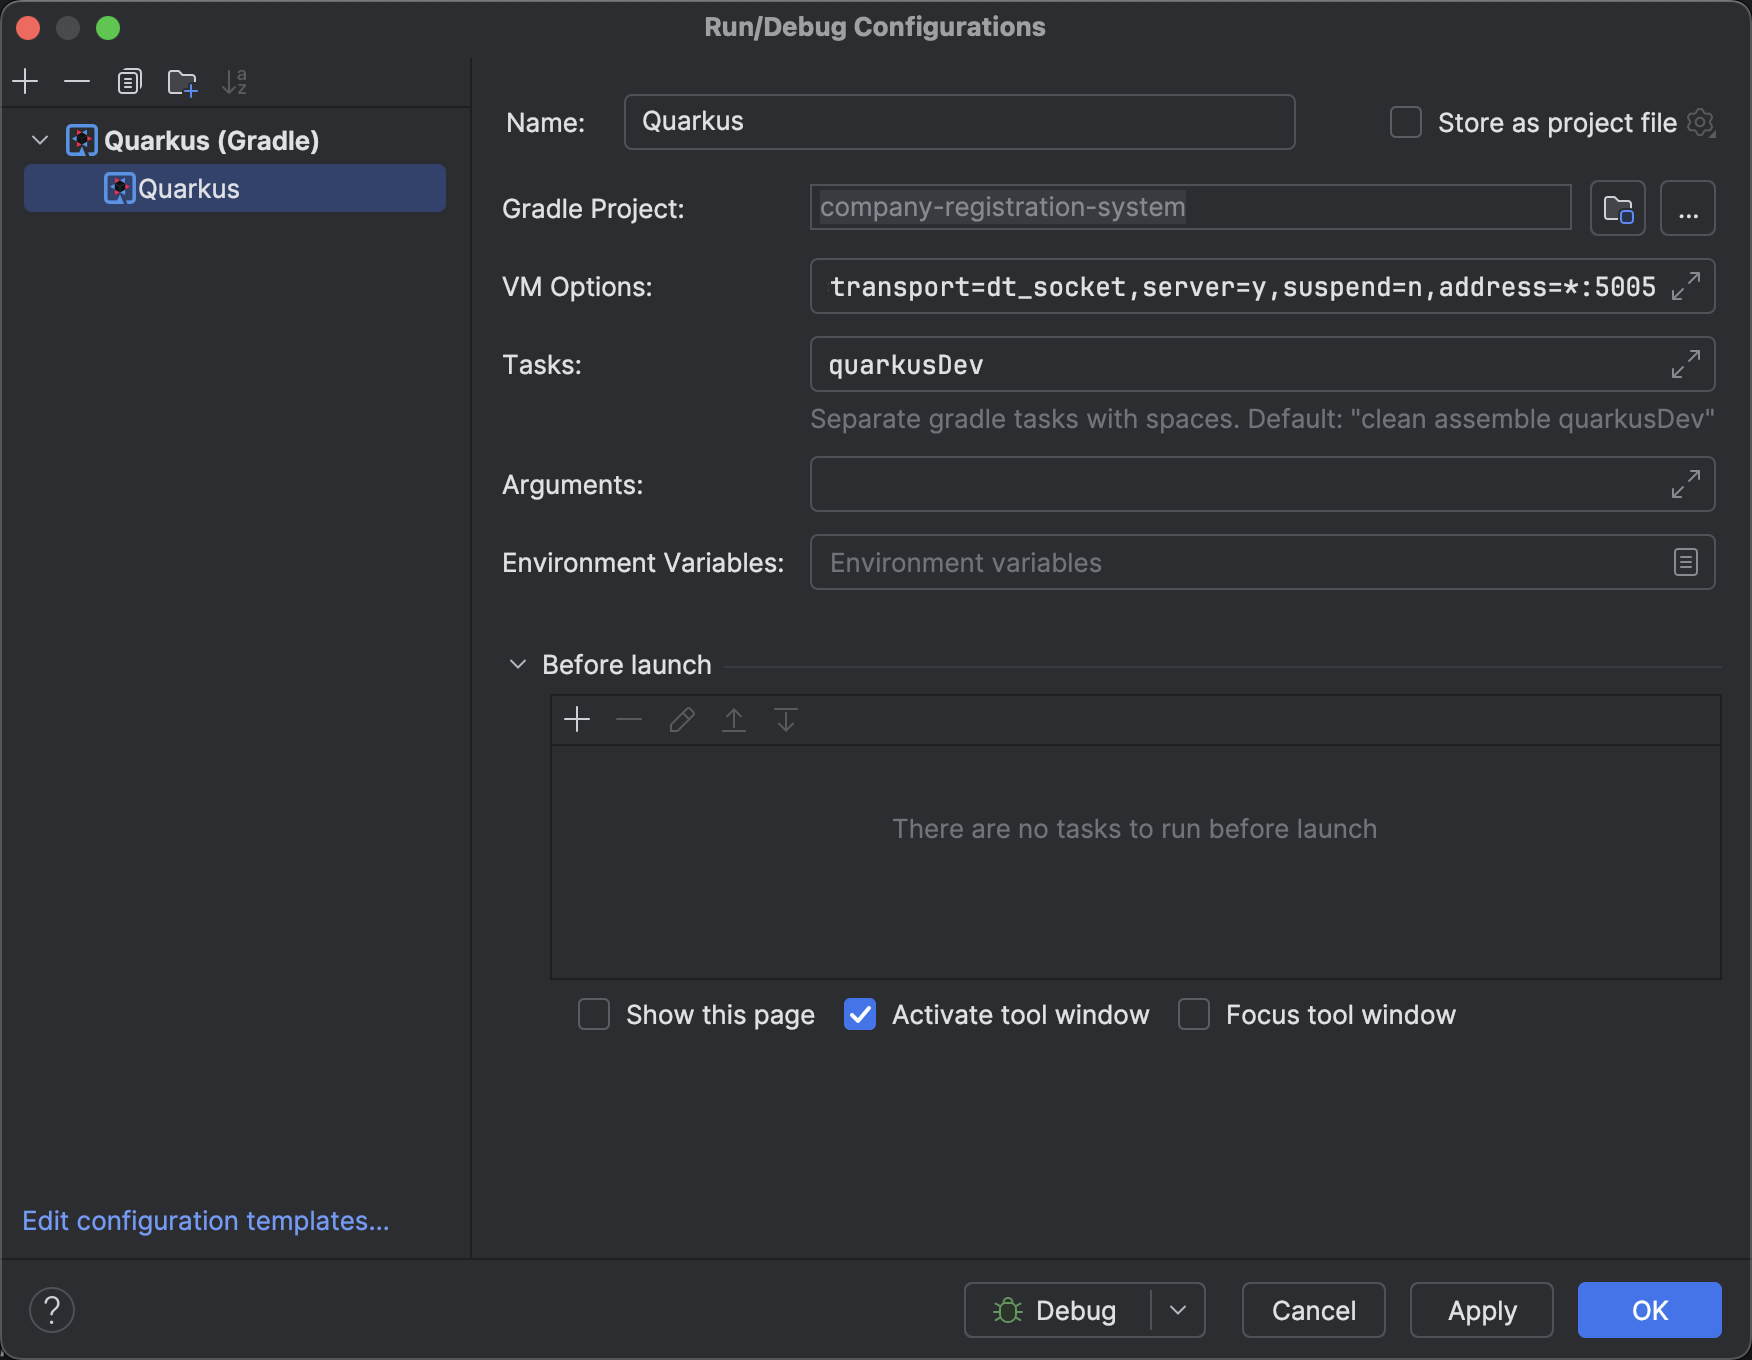
Then set up the Run Configuration for Quarkus in Debug Mode:
- Now let’s configure IntelliJ to run quarkusDev with the debugger enabled.
- Go to
Run>Edit Configurations - Click the
+icon > Select Quarkus - In the new configuration:
- Name: Quarkus Dev Debug
- Gradle project: Select the root of your project
- Tasks:
quarkusDev - VM options:
-agentlib:jdwp=transport=dt_socket,server=y,suspend=n,address=*:5005
- Go to
Swagger UI Access
You can now access the Swagger UI at:
http://127.0.0.1:8080/companyregistrationsystem/so/openapi/ui
Refer to the screenshot below for visual confirmation of the successful startup:
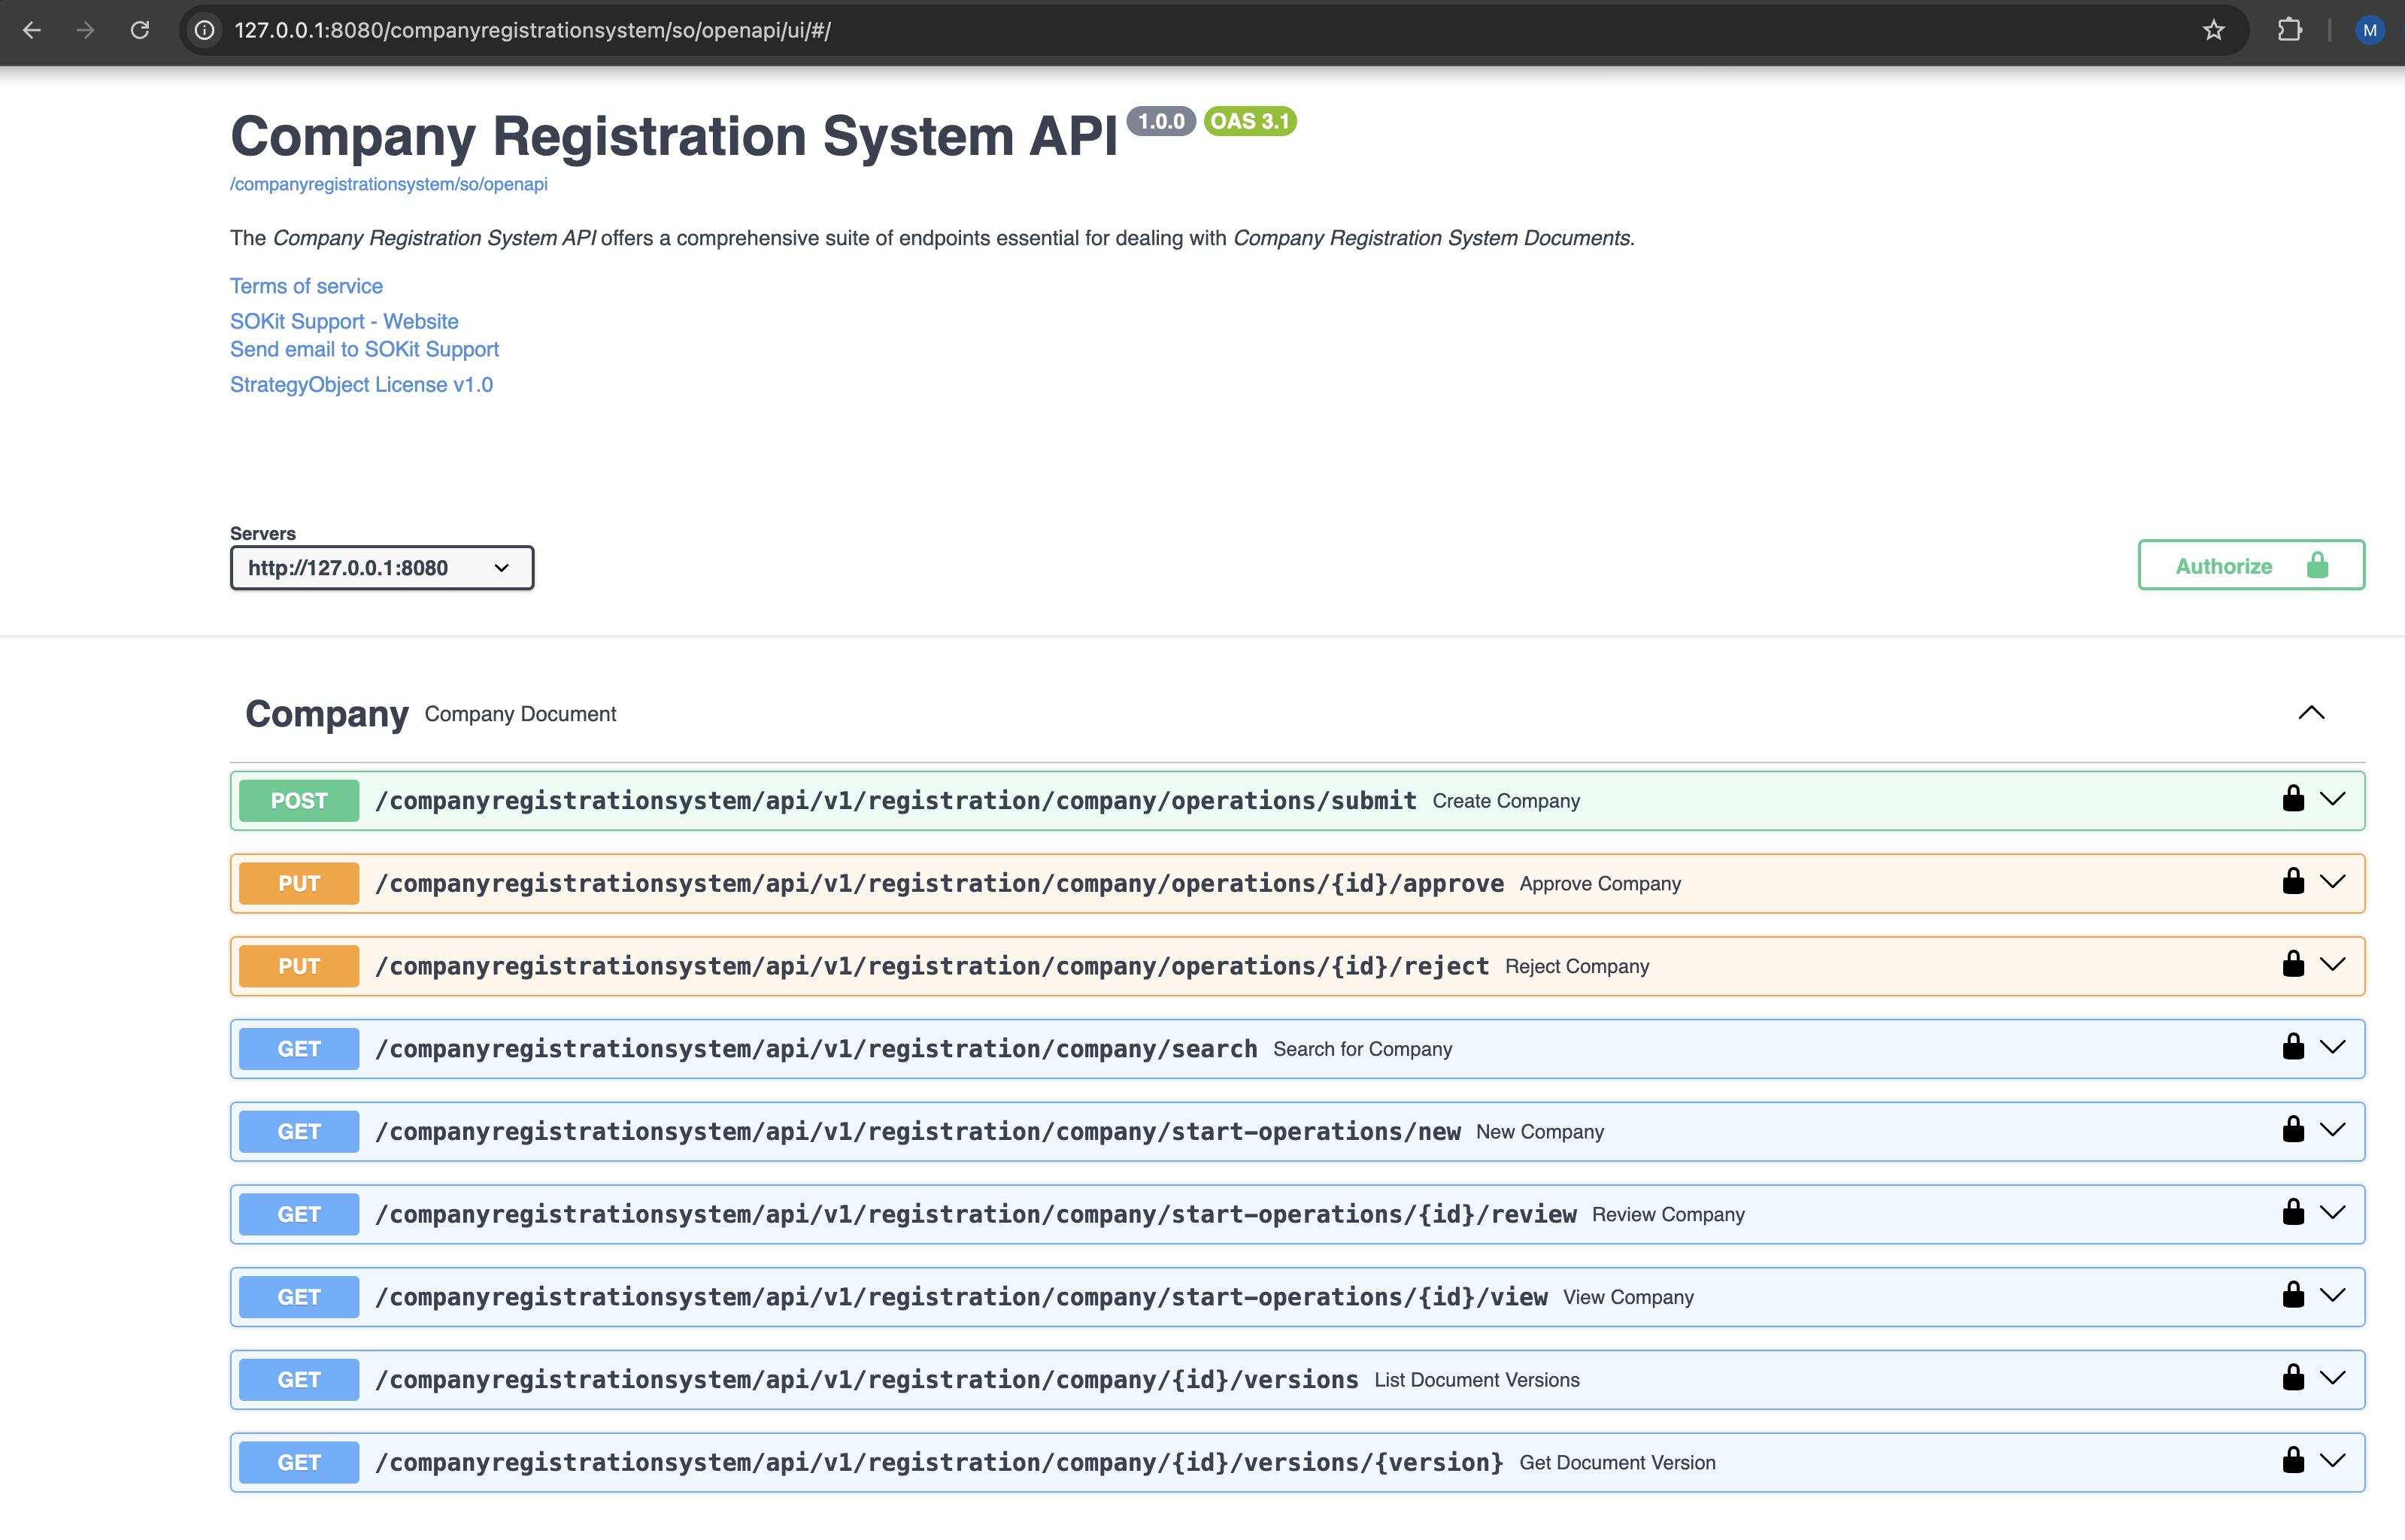
First Walkthrough Swagger
Swagger UI provides a visual interface to explore and test the application's REST endpoints.
From the Swagger interface, you can:
- Expand each endpoint to view its documentation
- See the expected request and response formats
- Use the Try it out feature to invoke endpoints directly
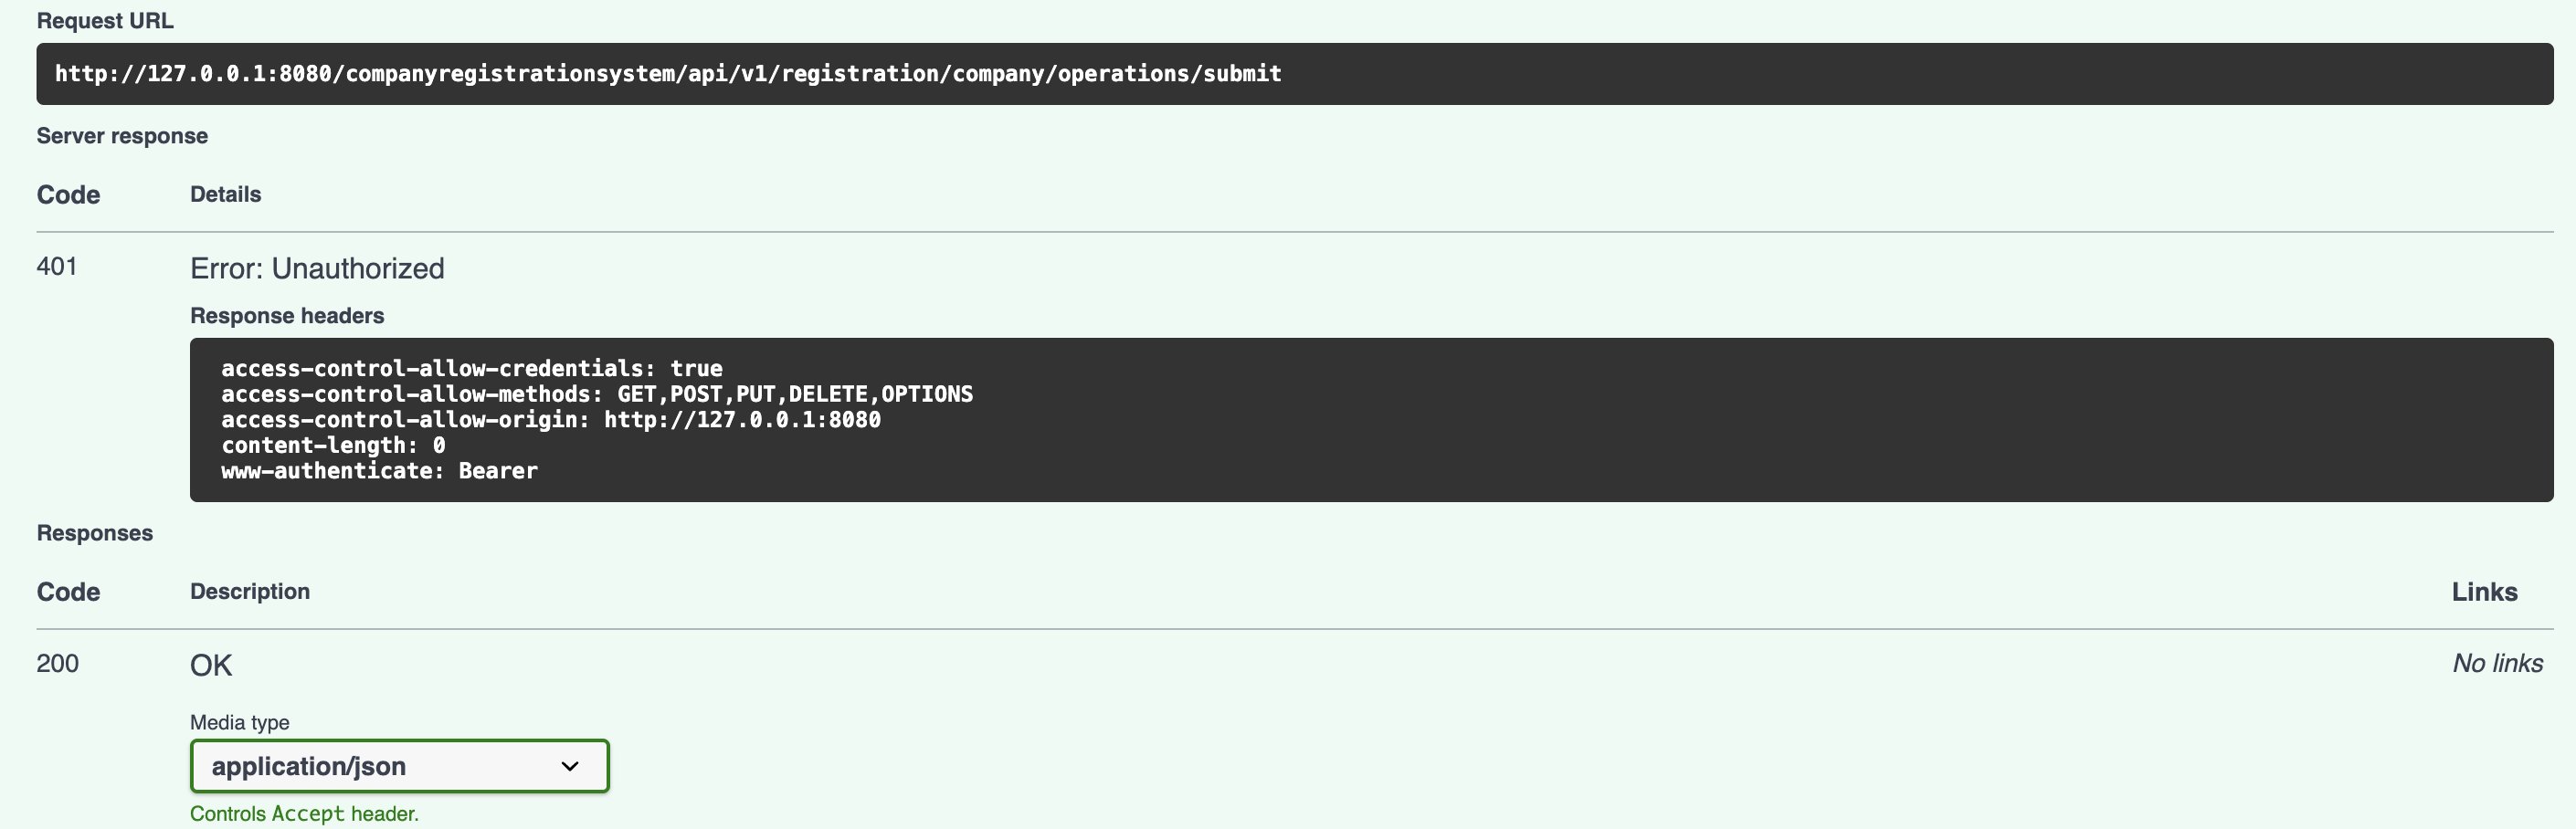
If you try to invoke an endpoint at this stage, you will receive a 401 Unauthorized error.
This is expected, as authentication is required to access protected operations.
You must authenticate using a valid user with the appropriate role. This is explained in the next sections.